Saturday, 27 August 2016

Caprice Chalet - Unlocking Miniatures

There is a wide range of miniatures available to use in your designs at the Caprice Chalet. You can purchase miniatures from Dollshouse Miniatures and by purchasing them from rooms downloaded from other players. Some miniatures can be unlocked by interacting with NPC characters and there's quite a few to unlock through this method.

Floors, walls and frames can be only by unlocked through interacting with NPC's. For example, complete Design Requests for brand representatives and they will give you a special wallpaper, floor or frame in return.


You can receive special miniatures items through the following methods:
  • Attending events with NPC's characters, i.e. visit the Restaurant with Adelaide.
  • Complete Design Requests from brand representatives.
  • Having your fortune told by Magda who came be found at train station locations.
  • Visiting Sasha's shows at the Live Music Club.
  • Completing modelling requests at the Photo Studio.
  • Purchasing clothes from the Exhibition Hall - once you have purchase a certain amount of items from a brand, the representative will provide you with a special miniature of their clothing.
  • Completing the Fashion Show. Ricky will provide you with a miniature item. 
  • Talking to NPC characters with musical notes.

For more information on the Caprice Chalet, please refer to the master guide for the Caprice Chalet.

Caprice Chalet - Decorating Rooms

Style Boutique allows players to decorate dollshouse rooms and place them in a large dollshouse at the Caprice Chalet. These rooms can be downloaded by other players via room codes or rented out to NPC characters. This guide will cover how to decorate rooms and the types of miniatures available.

Welcome to the Caprice Chalet!

For more information on the Caprice Chalet, please refer to the master guide for the Caprice Chalet.


Visit the Caprice Chalet and select the dollhouse icon above the rooms and then the Dollshouse icon on the menu screen. Next you will see the current layout of your dollshouse and you have the option to remove, alter, create, add or view rooms. Select an empty room and select Create. A menu screen will appear with the following options: 
  • Floor - select the type of flooring for the room. There is a range of designs including wood flooring, grass, tatami, carpet tiles and many more.
  • Frame - select the frame that will appear on the edge of the room in the Dollshouse and are usually brick or coloured ones. There are 10 frames to collect.
  • Walls - select the wall covering for the room. There is a range of designs including wallpaper, panelled, halloween themed, garden themed and many more.
  • Tidy Up All - clears out all miniatures placed in the room.
  • Furnish - place and rearrange miniatures in the room.

Now, we're going to look at how to decorate the room using the Furnish feature. Select the Furnish option and a screen will appear on the bottom 3DS screen that has a bunch of dots. This is the space you can place miniature items. The purple dots are for items that can be placed on walls and pink dots are for items that can be placed on the floor. Select the miniature box icon to open up your collection of miniatures. The following sections of miniatures are available:
  • Shelves - includes items such as showcase, shelves and display stands. Smaller items can be placed on the shelves of this items, i.e. food or flower pots.
  • Chairs and Sofas - includes items such as benches, couches and cafe chairs. Smaller items can be placed on top of certain items, i.e. a tabby cat can be placed on top of a garden bench.
  • Clothes - includes a wide range of miniatures of clothing items in the game such as hats, shoes, bags, dresses and tops. These items can be placed on shelves of various items or placed on coat hangers.
  • Lighting and Clocks - includes items such as wall lights, desk lamps, clocks and studio lights.
  • Electronics - includes items such as speakers, drum kits, the Animal Crossing Happy Home Designer DLC items and TV's.
  • Miscellaneous - includes a wide variety of items such as kitchenware, toys, makeup items, artworks, fortune teller balls and mirrors. These items can be placed on shelves, floors or walls.
  • Plants and Animals - includes all the cute animal miniatures you can get and all plant items. Some plants can be placed on top of other items as can the animal miniatures.
  • Food - includes a variety of delicious food miniatures such as cakes, pudding, bread, pizza, jars, donuts and macarons. These can be placed on top of items and make good display pieces in the showcase display miniatures.
  • Shop Resources - includes items such as cash registers, makeup displays, signs and mirrors. Cash registers are a must have item when designing a boutique shop room.
  • Custom Collection - features miniature items of make-up sets you have collected in the game and hair salon catalogues.
  • Doors and windows - includes a wide range of doors and windows that can be placed on the wall of the room.
  • Furniture - includes items such as beds, carpet mats, chest of drawers, kitchen cabinets and staircases.
  • Clothing Displays - includes a wide range of bust displays, miniature mannequin for displaying outfits, coat hangers and racks. Clothing items can be placed on these items.
  • Tables - includes items such as counters for shops and tables in a range of different sizes.


You can obtain miniatures by purchasing them from the Dollshouse Miniature Shop or by receiving them from NPC characters throughout the game. There is a wide range of miniatures that can be unlocked through NPC characters and please refer to this guide on how to obtain these miniatures. You can also purchase miniatures from rooms you have downloaded from other players.


Select a miniature and the top screen will display the name and how many of that miniature you have. You can only place each miniature item in one spot. For example, I own two colourful showcase miniatures and I place one in one room and the other in another room. I can no longer use this item unless I purchase more of the item or remove it from the rooms. The bottom screen displays little dots next to each miniature and these dots tell you how many spaces the miniature takes up. Select the miniature and click OK. Use the stylus to place the miniature in the location you want it and click Place. If you click on the miniature, some items will have an option called Bits & Bobs. Select this option to place miniatures on top of the items (i.e. on shelves, coat hangers or counters). If you want to remove the miniature, click and drag it to the little box icon on the right hand side. Use the arrows at the top of the screen to change the direction of an item.


Now there's a trick to placing items in a room. If you place an item right next to the wall, you will notice the purple dots behind the item have become faded. This means you cannot place an item on these dots. Same with if you place an item on the wall such as a mirror, you can longer place an item in front of it as the dots are faded out. It's quite annoying as you lose valuable space when designing and you should be able to place items right up to each other like you can in the Animal Crossing games.


Once you are happy with your design and have selected a floor, wall and frame for the room, click the OK button. The game will ask for you to name the room and to save the game data. After this it will ask if you wish to set this room as your streetpass exhibit, select No if you wish to keep your current one you have set.

Caprice Chalet

Style Boutique 2 (Style Savvy 3) has a new feature that allows you to decorate dollshouse rooms and display them in an area called the Caprice Chalet. There is a wide range of miniatures to collect in the game that can be used to decorate rooms. Other players can download your room via a special code and you can rent rooms out to NPC characters. The Caprice Chalet has added an whole new level of fun and design to the Style Boutique franchise.

 
For more information on the Caprice Chalet, please refer to the master guide for the Caprice Chalet.

When you first enter Caprice Chalet, you will see the dollhouse on the top screen and the bottom screen displays the rooms currently placed in the dollhouse. Select a room to visit it and you will be greeted by any of the following:
  • An NPC who will talk to you briefly before you are shown what the room looks like. No interaction options are available.
  • An NPC who has rented the room from you. They will either tell you how they are going or will provide you with the rent money for letting them use the room. More on that here.
  • The player character of the room you have downloaded via the Connect feature. They will allow you to purchase items from their room for a certain price. 


Select the dollhouse icon above the rooms to enter the Caprice Chalet. A menu screen will be displayed on the bottom screen that displays a number of options: Profile, Exterior, No. of Rooms, Dollshouse and Spare Rooms. Here's a rundown on what each option does.

Profile
This is where you can view and change your profile that will appear when other players download your room. It displays information such as your name, location, age bracket and information about your character. The personality on your profile changes depending on the fortune you receive from Magda. You can make the following changes to your profile:
  • Favourite Pattern.
  • Favourite Brand.
  • Favourite Colour.
  • Dream Job.
  • Shop Name.
  • Notes - this part is hilarious as you can get options that talk about cheese for some reason. It will ask you to select three notes.
The profile displays the title of your Streetpass Exhibit and the online address code for room you have currently available for download. Your profile will also list the day you begun playing the game and how many streetpasses you have received.


Exterior
This option allows you to change the appearance of the dollhouse. There are three options available: green roof with a dark red/brown brick, red tiled roof with sandstone bricks, or colourful roof with light brown/red bricks.

No. of Rooms
As you progress through the game, you can unlock more space for rooms in the dollshouse. You start out with the four room layout and there's two more layouts to unlock: six rooms and nine rooms.

Dollshouse
Select this option to view, alter, add or remove rooms. For a detailed guide on how to decorate rooms, please visit this guide. To remove a room, select the room and click Remove Room. To add a room, select Add Room and the game will bring up the list of spare rooms you have. Select the room you want and click OK. To alter a room's layout, select Redo and it will bring up the decoration option. Select View to view the room and use the analog stick to move the camera angle.

Spare Rooms
All your rooms you have created and downloaded are stored here. Icons are displayed next to rooms to identify where the room came from or is located. A blue house means the room is currently displayed in your dollshouse. A Running Man means this room is your current Streetpass Exhibit. A green icon means this room was received through streetpass or downloaded through a room code. Rooms without an icon mean that they are ones you have designed and are currently not featured in the dollshouse. In the Spare Rooms option, you can delete rooms, view the profiles of characters of rooms you have downloaded and favourite rooms using the star icon. 

Thursday, 25 August 2016

Designer Lounge Requests - Picture Guide

In Style Boutique 2/Style Savvy 3, you can take on the role of a fashion designer. Once you have unlocked the Designer Lounge in Taylor Arcade, brand representatives will request for you to design a clothing item for their brand. You will need to visit the Designer Lounge on certain days to unlock the design request.This guide will cover what each clothing item will look like that brand representatives request for.

All pictures in this guide follow the order stated in the Designer Lounge Request Guide. Pictures for the two items that occur during the main storyline of the game (Brooke Bridge Shirt & Enid Chen Dress) are not included. Many of these designs follow the strict requirements set by the brand representatives. Some allow you choose which pattern/colour/decoration you please, so you do not have to follow this guide exactly.


Wednesday, 24 August 2016

Designer Collection

When visiting your apartment, there is an option called Designer Collection. This is where you can view clothing items you have downloaded from other players at the Caprice Chalet room. Here's a rundown on how it works.
  1. A room you have downloaded at the Caprice Chalet features a mannequin wearing a design the player has made, i.e. dress, shoes or top.
  2. Ask the character to purchase the outfit.
  3. Visit the Designer Collection at your apartment to view the outfit you have downloaded.
  4. The outfit has been added to wardrobe for you to wear.

Designer Collection is similar to your portfolio as it showcases designs of clothing. Designs can be deleted from your portfolio. Here are some examples of items I have downloaded and added to my Designer Collection.


Tuesday, 23 August 2016

Design Patterns

There is a wide range of clothing items you can design in Style Boutique. Visit the second floor of your boutique and select free design to design your own pieces of clothing. This is also where you will complete design commission requests for brand representatives.

To start off, you first need to unlock the designs, patterns and decorations through design requests from the Designer Lounge. Please refer to my Design Request Guide on how to unlock each one and the Commission Request Guide on how to complete them and unlock new patterns. A guide on where each pattern and design can be unlocked can be found in the Pattern and Designer Location Guide.

The clothing items you can design in Style Boutique include:
  • T-shirts.
  • Tights.
  • Shoes - Slip-ons, Trainers and Boots.
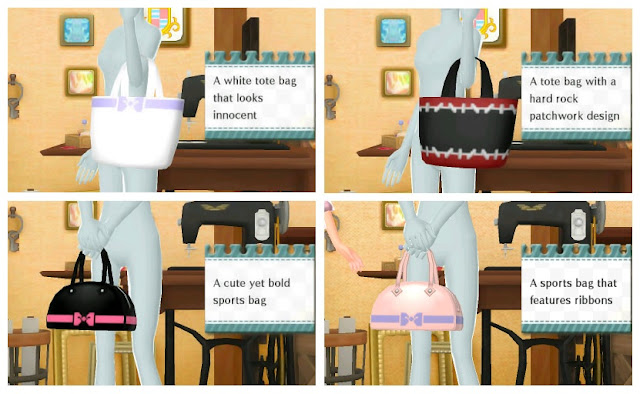
  • Bags - Tote, Sports Bag and Round Bag.
  • Dresses - Princess, Sleeveless, Sheath, Mini and Mermaid.
  • Special Tops - Shirt, Sleeveless Sailor Shirt, Camisole, Corset, Waistcoat, Blazer and Sleeved Sailor Top.
  • Special Bottoms - Mini Skirt, Maxi Skirt, Shorts and Tutu.
Each design can have a pattern and decoration associated with it. This picture guide details all the items you can design and the patterns and decorations that can be applied.

Clothing Items - T-shirts, Tights, Shoes & Bags. 


Dresses - All types.


Special Items - Tops and Bottoms. The Bottom option only appears once you select a top option. For example, you can pair a maxi skirt with a blazer top.


Patterns and Decoration options for T-Shirts.


Patterns and Decoration options for Tights.


Pattern and Decoration options that can be applied to Slip-ons, Trainers and Boots. The example shown it the slip-ons.


Pattern and Decoration options that can be applied to all types of bags. The example shown is the tote bag.


Pattern and Decoration options that can be applied to all types of dresses. The example shown is the sleeveless dress and the decoration examples show what each decoration type looks like on each type of dress.


Pattern and Decoration options for all special items. The patterns can be applied to all design items and some decorations are specific to certain items.

Patterns for all special items including decoration accessories.
Decoration options for shirt, blazer & waistcoat.
Decoration options for bottoms.
Decoration options for sailor shirts.
Decoration options for Corset & Camisole.

Monday, 22 August 2016

Phone Menu

In Style Boutique 2/Style Savvy 3, all you need to do is open you phone menu to access a variety of helpful features in the game. The phone menu can be found by clicking the phone icon in the top right hand corner of the bottom 3DS screen. The phone menus has the following layout and I will explain what each section means below:


First off is your Album. This displays all the photos you have taken in the game and these photos are saved to the 3DS SD Card. Select album to view your photos or delete them. You can hold 200 photos in your album.


Messages displays text messages you have received from characters in the game. Most of the time, it's Ricky reminding you about selling fashion show tickets or to come attend the fashion show. 


Schedule details events you need to complete in the game. These include design commission requests, visiting NPC's, traveling to different locations and customer requests for clothes/makeup/haircuts.


Profiles details all the characters you have met in the game as well as people you have streetpassed or downloaded Caprice Chalet rooms from. When you select a profile, it will bring up information about that character and how many times they have visited the Boutique, Hair Salon and Beautician.


Colour Palette is where you can check all the colours you have unlocked in the game and ones you still need to find. I have made a handy guide on finding and unlocking every colour in the game here.


Connect brings up the three options for online play in the game (it's very lackluster). The first option Swap Rooms brings up a few more options. Share Rooms allows you to share a room you have designed at the Caprice Chalet. It will provide you with a address code that you can give to others to visit your room. On Exhibit details what room you currently have at your room address. Download Room allows you to download rooms from other players all over the world. You enter the address code of the room and it will download it. You can then save the room to your Caprice Chalet to visit. I will post a whole bunch of room codes soon, but why not visit my PopPop Boutique at 180-239-9851?

Contests allows you to enter contests on Miiverse and requires a Miiverse account. I personally don't use this at all as it has the worlds slowest loading times. Go Out brings up the multiplayer options you can use with another player who owns a copy of the game. For a detailed guide on multiplayer in Style Boutique, visit my Multiplayer guide here.


AR Photos allows you to use AR Cards to bring game characters to life in the real world through the use of the AR Cards supplied with the 3DS. For information on how to use this feature, visit my guide on AR Cards.

Amiibo allows you scan in compatible amiibo figures into the game to unlock special Nintendo themed items. For a detailed guide on using amiibo in the game and all the items you can unlock, please visit my amiibo guide.

The little green question mark square directs you to the game manual and click the magnify glass to open the Fashion 101 guide. This guide covers various terms used in the game and provides definitions of things such as hairstyles, clothing styles, brands and locations in the game.


And lucky last, the most important button. The save button! Press these button to save your progress in the game. Don't forget to save before you turn off your 3DS!